Showing posts with label wood. Show all posts

Wednesday, January 7, 2015

Shed Construction 01

Some more photos from construction of the shed:
Lots of lumber!


Unloading...


2x4's were a lot easier to unload than the plywood/pressboard/siding.

This is about a week behind, so I have a good bit more to come soon :)

Saturday, September 17, 2011

Soap dish progress

I'm slowly making progress. I started out with a 48" board. I now have about 24" worth of scrap red oak strips, one promising soap dish, and a little more than 12" of good wood still left. The reason for so much scrap wood is that the wood bits I had were very coarse, as wood bits tend to be. I would start drilling, and it would be fine until the very end, when it would catch and mangle the piece or just tear it in half. I tried different speeds, fast, slow, and speeds in between, but it always caught. A drill press would have helped I think. (And could have drilled the holes straight the first time!) Here is a photo of some of the mangled wood:

I finally managed to figure out how to drill a 1/2" hole without splitting: Drill a pilot hole, and then just use a stepped metal bit. The metal bit is for a much harder material, so it shaves off material much more gradually, so the wood doesn't split. The problem that I had was that the step was not quite long enough for the piece of wood that I was using, so I had to drill from both sides, which I'm sure didn't help the hole to be straight. Be that as it may, Here is the dish while gluing, before finishing.


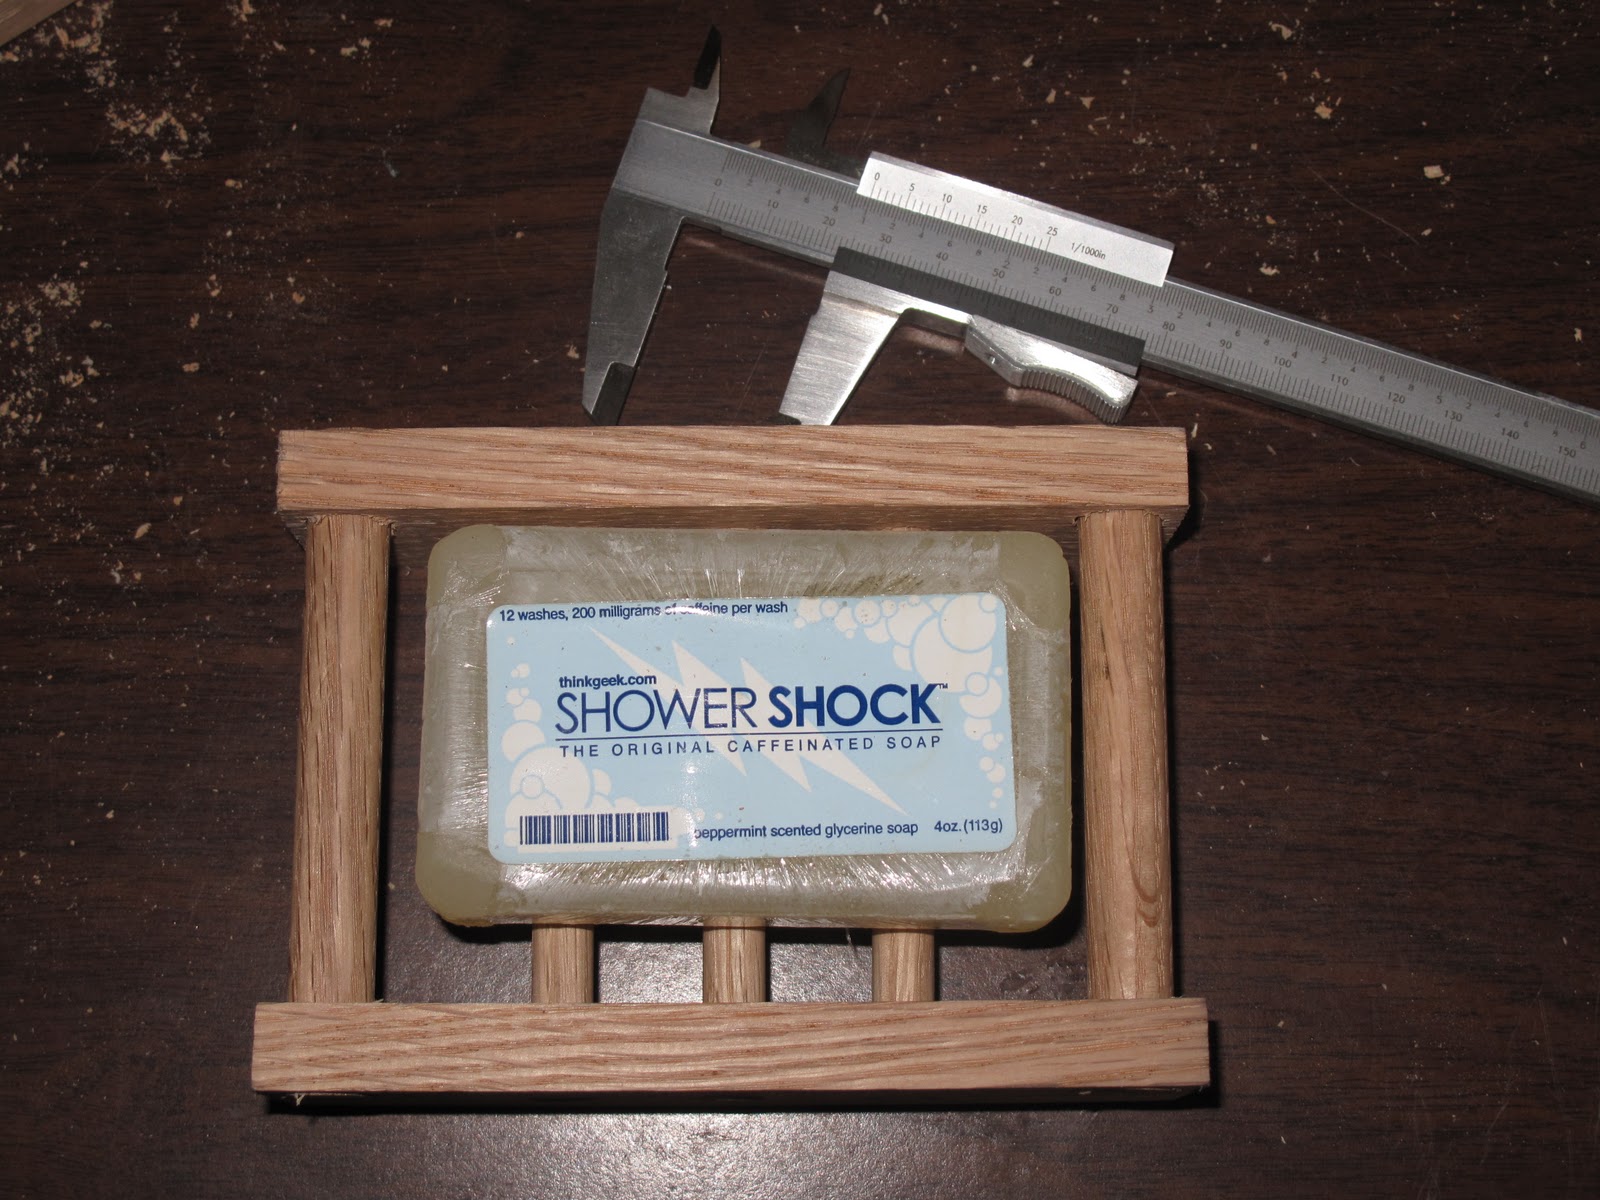
And with soap...
I'm not sure how I should seal it, but I have some shellac I will try, and see how that works.

Soap dish

I am now also making wooden soap dishes for Stitches and Sticks. Below is the image that mine are based off of.


Here are some photos of mine, just to get an idea, as it's still a work in progress.

The calipers are set to 6"

1" chisel, wood pieces, calipers set at 1", and bar of soap for size comparison
I'm using red oak, and it seems to be working well, but for the next step it would really help to have a drill press, however, not having one I'm just going use a hand drill and see how it comes out. It should be fine, but it's certainly harder.

Friday, September 16, 2011

Banjo photos

Well, I said a post or two ago that I would post photos at some point, so here they are! 

Below is a photo of the red oak from Home Depot

Detail of the red oak. The knot looks rather interesting.

Bolivian Rosewood from Bell forest Products.com

Below are two photos for texture / colour comparison
I couldn't decide which photo I liked better, so I uploaded both.
Bottom: Bolivian Rosewood with clear shellac
Left: Red oak with clear shellac
Right: Red oak with oil based finish
The tops of the red oak pieces are unfinished.

The camera tended to give these a slightly warmer than natural look, but they give a good idea of what they look like.
I really enjoy working with nice wood, which this is. I hope I can do a good job with it!

Thursday, September 15, 2011

Banjo

I now have the wood for the neck of the banjo. I'm using red oak from home depot. The fretboard wood is some nice bolivian rosewood from http://www.bellforestproducts.com/. I'm planning to finish it with clear shellac. I say clear because they have amber shellac too. I may post photos at some point also.

I'm still working on the tone head. For me this is the hardest part, but a friend of mine had a really good idea which was to simply secure the plastic onto one ring, and then heat it, and see if it will shrink enough not to need any more tensioning, so that's what's in progress right now. The main problem seems to be how to glue or attach the plastic sheet to the metal ring.

Tuesday, July 26, 2011

Banjo neck

I had another idea; we have a lot of oak, some white and some red. If I could age/dry some of that, I could save about $30 for wood. I'm not sure if I will actually be able to do that, as that usually involves a kiln, and the closest thing that we have is an oven that we aren't using, but I'm not sure that one, I would be allowed to use it for that, and two, that a 3 foot piece of wood would fit in it.

Saturday, July 23, 2011

Banjos

Well, as I mentioned earlier I am building banjos. I am making one at a time, and if it works that's all I need it to do. I will then improve upon that in my second, which should be much nicer. I am somewhat undecided what wood to use for the neck. I am using red oak for the body, and I want it not to clash with that. So far I am considering using: Bubinga, Osage Orange (Argentine), or Padauk. Just for fun, here are their
corresponding Latin names:
Guibourtia demeusei (Bubinga)
Maclura tinctoria (Osage Orange Argentine)
Pterocarpus soyauxii (Padauk)

I am considering getting one of each, but they are about $20 each currently, plus shipping. That actually seems to be a reasonable price, but it's still a lot, unless I sell some things soon. I am planning on using East Indian Rosewood (Dalbergia latifolia) for the fretboard. I might also do some fretboard inlay work, probably the diamonds.

More some other time,

73, DE KJ4BXT K